How to Create
Wet Paint Type
using Photoshop
Elements 2.0
|
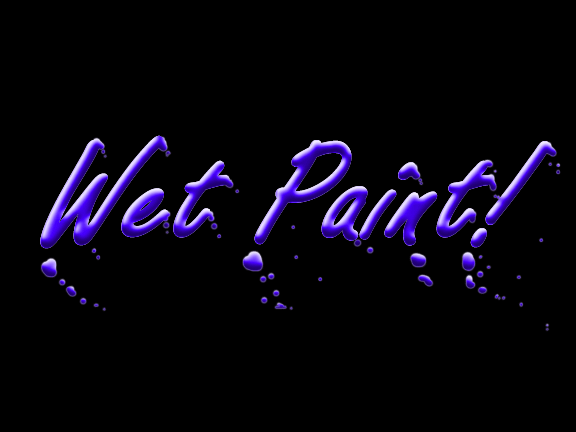 |
| Here's how to make a clever effect for headings and
signs. It's the Wet Paint effect for text. |
|
| 1. Open a New page, go to the Edit menu and
choose Fill. Fill with black at 100% opacity. |

|
2. Use the Type tool
 to enter the type that will become the wet paint type.
Select white as the type colour.
The fonts that work best for this effect are script or
calligraphic. The ones that look a bit like handwriting.
For this example I chose BrushScrD size 100 |
 |
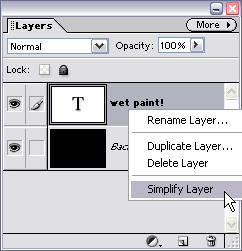
| 3. Go to the Layers palette, right
click and choose Simplify Layer
Note: This step changes your text into a form of
picture, once you have done this, you cannot go back and change the font
or size or spelling etc.
|
|
| |
|
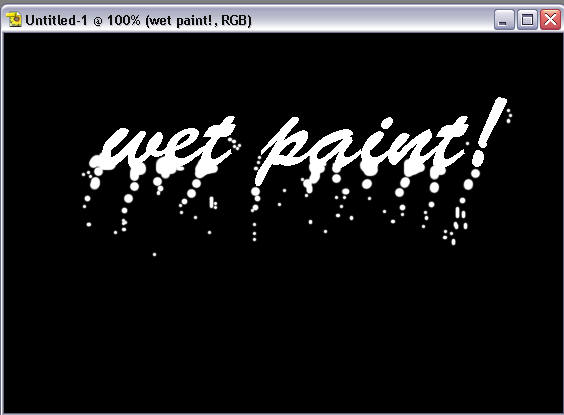
| 4. Now take the paint brush and white paint and add in some drips and
drops to your text. I combined several brush sizes to create the drips in my example.
They don't look too much like wet paint at this stage, but the will turn
into small blobs of paint later
|
|
| 4. Right click on the Wet paint layer and choose Duplicate
Layer from the pop up menu |

  |
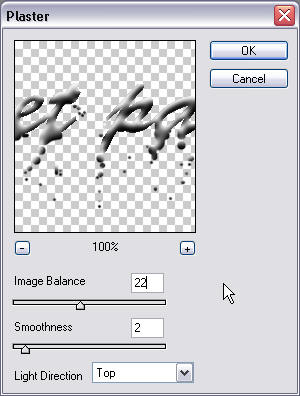
| 5. Set the foreground colour to white and the background to
black

Go to to Filter menu, select Sketch and then Plaster.
Set the values like my example here |
|
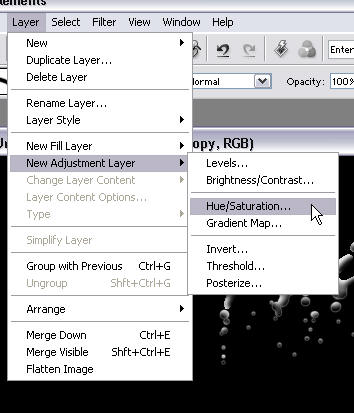
| 6. Go to the Layer menu, select New Adjustment
Layer and choose Hue/Saturation. Choose Group with
Previous Layer so that the adjustment affects only the layer
below |
 |
| 7. Select the Colorize option and use the small
triangles to adjust the Hue, Saturation and Lightness until you like the
way the wet paint type looks.
When you are happy with it, click OK. |

|
| 8. That's it! You've finished. Time to save your work.
|

|
| If you want to go back and make some adjustments to the
Hue/Saturation levels, double click the icon in the layer palette. |

|
TASK:
|
Make two (2) more wet paint type
headings or signs.
|
|
|