How to create
Rainbow Scratchboard Type
using PhotoShop
Elements 2.0
|
 |
| Remember when you were in Elementary school and you created
artwork by scratching a design onto a painting covered in black wax
crayon? This is a digital version of this style of illustration. |
|
1. Open a new file. Click the Gradient tool in
the tool box. 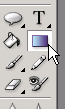 On the gradient
tool bar, open the drop down box On the gradient
tool bar, open the drop down box |
 |
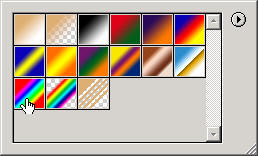
| 2. From this box choose the spectrum
choice.
For other pictures you can experiment with other
gradients. |
|
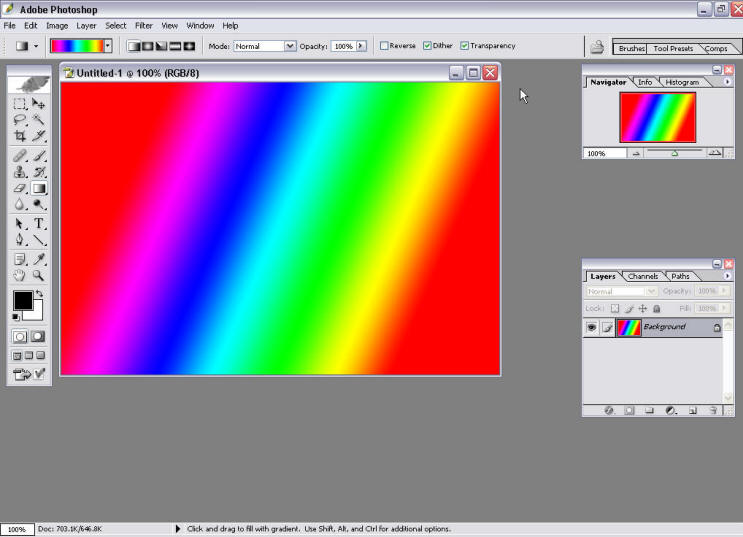
| 3. Now move the pointer onto the blank page and draw a line
across the page.
When you release the mouse a spectrum will be created.
If you don't like your spectrum, press Ctrl-Z to undo and try again |
|
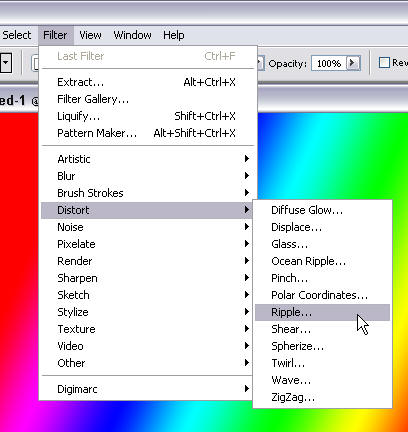
| 4. Go to the Filter menu and choose Ripple.
Set the amount to 999 and the size to large then click OK |

|
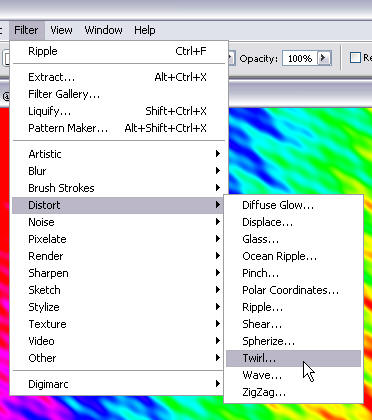
| 5. Go to the Filter menu and choose Distort
and then Twirl.
Set the angle to 999 |

|
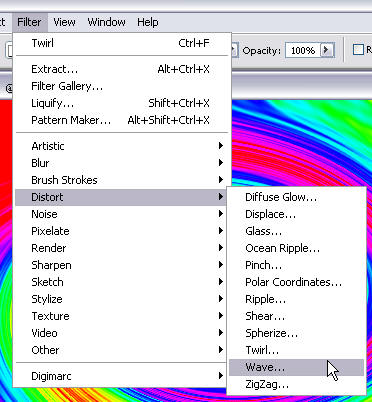
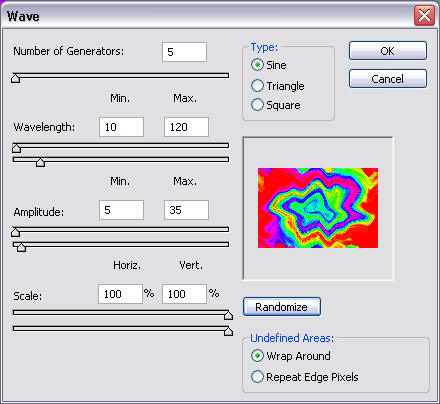
| 6. Go to the Filter menu and choose Distort
and then Wave.
You can adjust the numbers in the boxes to anything and then click the Randomize
button until the image is well distorted.
Click OK |
|
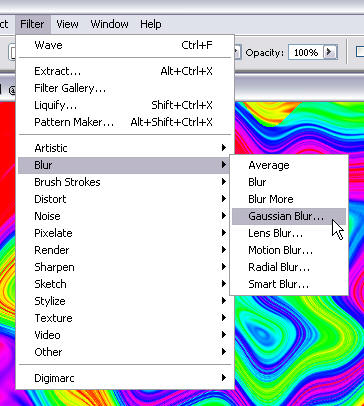
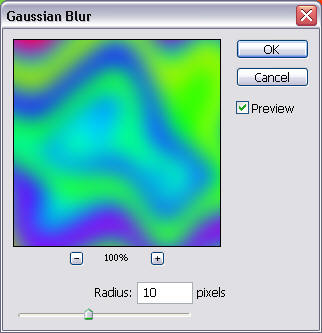
| 7. Go to the Filter menu and choose Blur
and then Gaussian Blur.
To adjust the amount of blur, enter a number in the Radius box.
For this example I used a Radius of 10 pixels |
|
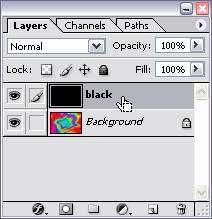
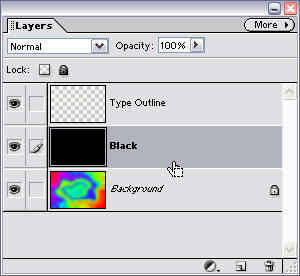
| 8. Add a new layer and call it Black. Go to the
Edit menu and choose Fill. Fill the layer with Black
at 100% opacity |
|
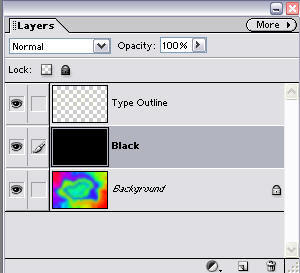
| 9. Add a new layer and call it Type Outline |
 |
| 10. Select the Type tool from the tool
box.
Click the small black arrow head in the bottom right corner of the Type
tool button  to get to the drop down
menu. Choose the Horizontal Type Mask Tool. to get to the drop down
menu. Choose the Horizontal Type Mask Tool.
Also choose a plain font like Arial
Black and a large size like
120pt |
 
 |
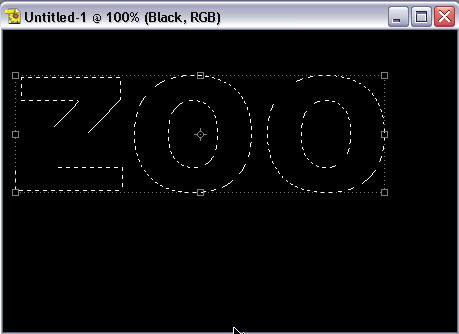
| 11. Click onto your page and type your message.
It will be in black and red to start with. Don't worry about the colour
at this stage. |

|
12. Now click back on to the Move tool in the tool
box  and your Type will change to Selected
Outline and your Type will change to Selected
Outline |
|
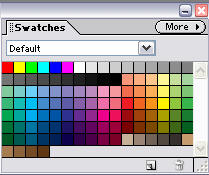
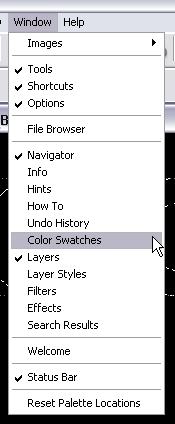
| 13. Select a bright yellow colour from the
colour swatches. If you cannot see your colour swatches, go to the
Window menu and choose Color Swatches |
|
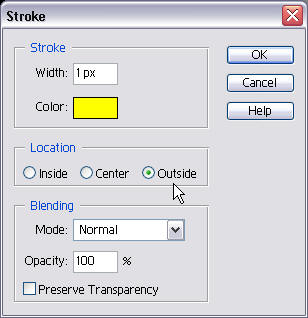
| 14. Go to the Edit menu and choose Stroke with
a width of 1 px and change the location to Outside
Click OK
Go to the Select menu and choose Deselect |
 |
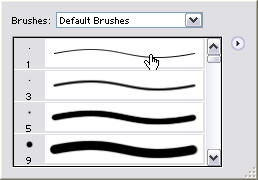
15. Select the Eraser tool from the toolbox

Now go to the Eraser Tool menu bar change to a 1 px brush |
 |
| 16. Change back to the Black layer |
|
| 17. Begin to scratch inside the letters. You may want
to zoom in to get a better view of your letters. |

|
| 18. Continue scratching until you are happy with the
result. Finally trash the Type Outlines layer so that all
that is showing is the Rainbow Scratchboard Type.
That's all, it's time to save your work. |
 |
| |
|
| |
|
Task:
|
Complete two (2) of these headings
|
|
|
|
|
|
|