
Sometimes you only need part of a picture and you need to remove the rest. To do this in Illustrator you create a clipping mask.
Here's how it's done:
1. Open your Illustrator page and place the picture you want to work with on the page.
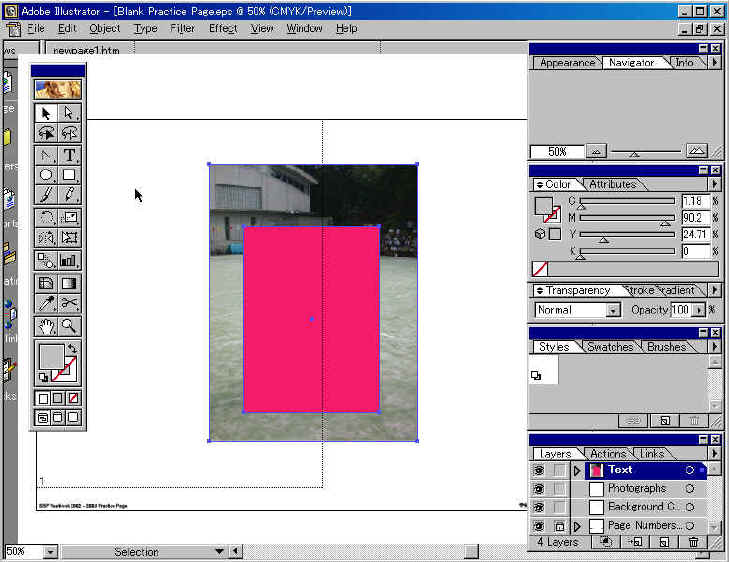
2. Add a colour to the foreground control  Any colour will do as it will not be seen later.
3. Select the Rectangle tool ![]() from
the tool box (later you can experiment with other shapes) and draw a box over
the part of the picture you want to keep.
from
the tool box (later you can experiment with other shapes) and draw a box over
the part of the picture you want to keep.

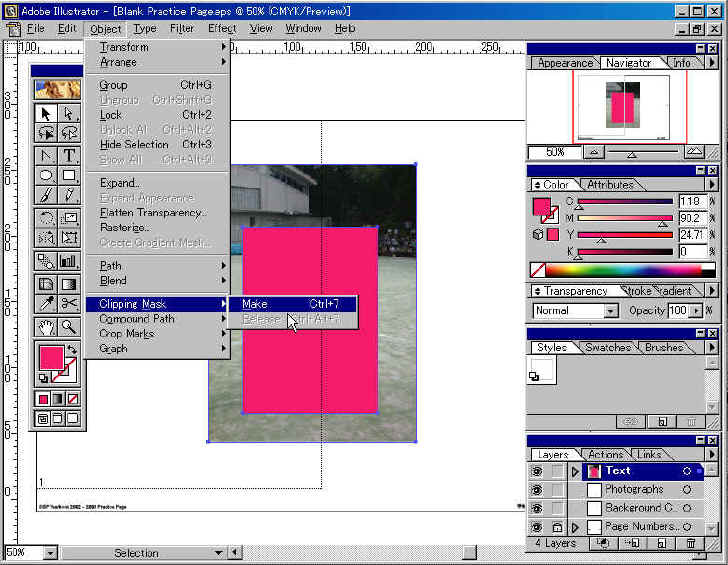
4. Choose the Black arrow tool ![]() from the tool box.. Hold down the Shift key and click the
photograph beneath the coloured box, so that both the box and the photograph
have been selected.
from the tool box.. Hold down the Shift key and click the
photograph beneath the coloured box, so that both the box and the photograph
have been selected.
5. Go to the Object menu, choose Clipping Mask and then Make
6. You will now only be able to see the part of the photograph that was underneath the coloured shape.

If you wish to release the clipping mask, click once on the photo, go back to the Object menu, choose Clipping Mask and then Release