![]() Changing a Photo's Colour Mode
Changing a Photo's Colour Mode
This site contains information and instructions for all the photograph formatting required for the yearbook.. Use the index below to jump from one section to the next.
|
|
RGB, CMYK, JPG, EPS, TIFF, DPI and Image Size |
|
| Images that will be used in
printed material like the yearbook, while similar to those designed for
the Web in terms of creativity, have very different requirements than
those designed for use on the Web. Images used in professionally printed
materials must be created with a knowledge of colour separations as well
as many other technical aspects. Very large file sizes are normal for this kind of image production. The most often-used formats are files with the extensions *.TIFF and *.EPS. The TIFF format is a "lossless" format, meaning that all the information that was present in the original file is still available in the compressed TIFF format. TIFFs are used for photographic images and are known as "raster" images. The digital photographs we take using the school cameras and the pictures we scan at school are almost always created as RGB jpg. You can tell if an image is a jpg by the icon. |
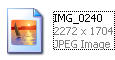
This is a jpg icon
|
| The yearbook is professionally printed using a
four-colour printing process called CMYK - cyan (C), magenta
(M), yellow (Y) and black (K).
Therefore all RGB jpg photographs that are to be used in the yearbook must be converted to CMYK and saved as an eps tiff. |

This is an eps tiff icon
|
|
Next Section
|
|
What is RGB?A large percentage of the visible spectrum can be represented by mixing red, green, and blue (RGB) colored light in various proportions and intensities. Where the colors overlap, they create cyan, magenta, yellow, and white. Because the RGB colors combine to create white, they are also called additive colors. Adding all colors together creates white--that is, all light is transmitted back to the eye. Additive colors are used for lighting, video, and monitors. Your monitor, for example, creates color by emitting light through red, green, and blue phosphors. |
Additive colors (RGB) |
|
Next Section
|
|
What is CMYK?CMYK is based on the light-absorbing quality of ink printed on paper. As white light strikes translucent inks, part of the spectrum is absorbed and part is reflected back to your eyes. In theory, pure cyan (C), magenta (M), and yellow (Y) pigments should combine to absorb all color and produce black. For this reason these colors are called subtractive colors. Because all printing inks contain some impurities, these three inks actually produce a muddy brown and must be combined with black (K) ink to produce a true black. (K is used instead of B to avoid confusion with blue.) Combining these inks to reproduce color is called four-color process printing. The subtractive (CMY) and additive (RGB) colors are complementary colors. Each pair of subtractive colors creates an additive color, and vice versa. |
Subtractive colors (CMYK)
|
|
Next Section
|
|
What is a JPG?JPEG (pronounced "jay-peg") is a standardized image compression mechanism. JPEG stands for Joint Photographic Experts Group, the original name of the committee that wrote the standard. JPEG is designed for compressing either full-color or gray-scale images of natural, real-world scenes. It works well on photographs, naturalistic artwork, and similar material; not so well on lettering, simple cartoons, or line drawings. JPEG handles only still images, but there is a related standard called MPEG for motion pictures. JPEG is "lossy," meaning that the decompressed image isn't quite the same as the one you started with. (There are lossless image compression algorithms, but JPEG achieves much greater compression than is possible with lossless methods.) JPEG is designed to exploit known limitations of the human eye, notably the fact that small color changes are perceived less accurately than small changes in brightness. Thus, JPEG is intended for compressing images that will be looked at by humans. What is an EPS?EPS stands for Encapsulated Post Script and represents both vector and bitmap data. EPS files are supported by virtually all graphic, illustration, and page-layout programs such as Adobe's PhotoShop and Illustrator. EPS files, also called "vector" images, are a very different format that is defined through mathematical relationships--these files will look crisp and clear no matter how large or small you make them. What is a TIFF?TIFF stands for Tag Image File Format. They have the capacity to hold millions of colors and are primarily used for professional printing. TIFF files are not suitable for the web. Images in the *.JPG format are not acceptable for color reproduction, although they may occasionally be used in a black and white printing. They are usually quite small in actual dimension as well as file size. Both of these formats are "lossy" formats, meaning that the computer, in order to create these compressed image formats, throws out a certain amount of information that was in the original file. This information cannot be reclaimed even if you convert these formats to TIFFs, which is why these formats are not be used in color reproduction by your professional publishers because the information needed for clean color separation is gone. |
|
|
|
|
Changing Colour Modes using Photoshop |
|
|
When you choose a different color mode for an image, you permanently change the color values in the image. For example, when you convert an RGB image to CMYK mode, RGB color values outside the CMYK gamut (defined by the CMYK working space setting in the Color Settings dialog box) are adjusted to fall within gamut. Consequently, before converting images, it's best to do the following:
|
|
How to convert an RGB JPG at 72dpi to CMYK EPS TIFF at 300dpi |
|
|
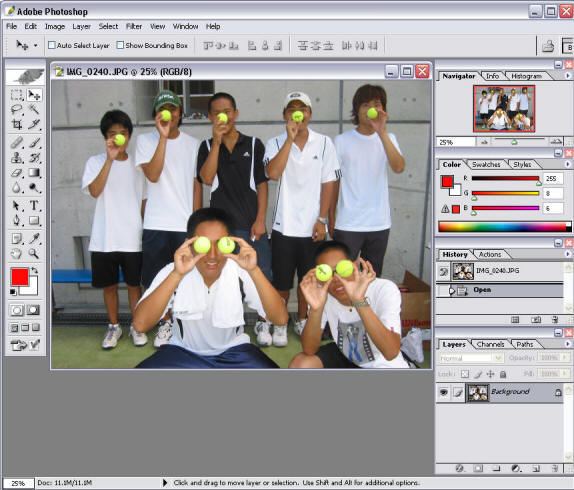
Open the JPG photograph to be converted in PhotoShop |
|
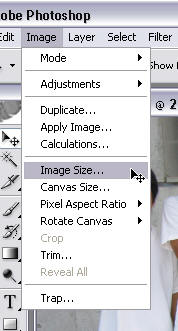
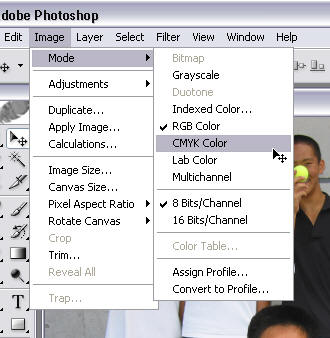
| Go to the Image
Menu and click Mode. Choose CMYK color and wait a few seconds while it converts |
|
|
|
|
Resolution and DPI |
|
|
One of the most important terms in digital imaging is dpi. It
stands for "dots per inch," and is sometimes used
interchangeably with ppi, or "pixels per inch."
It refers to how many individual dots (pixels) there are in every inch of an image. The more dots per inch, the higher the resolution. The average computer screen displays 72dpi. An entry-level inkjet printer can print 300dpi. A decent inkjet and many laser printers produce 600dpi or 1200dpi, while photo printers can print 2400dpi or higher. The more dots, the higher the resolution. What the image is being used for determines what resolution is needed. The digital cameras we use produce photographs at 72 dpi, but the pictures we use in the yearbook must be 300 dpi or higher. Therefore, the DPI or resolution must be changed using PhotoShop before you can use the photographs in the yearbook pages. |
|
|
Next Section
|
|
How to Adjust the DPI |
|
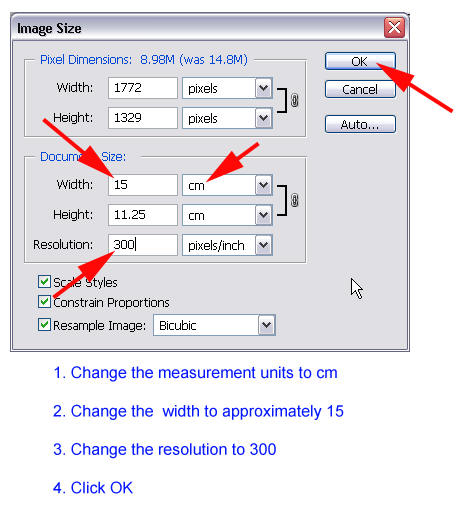
| Open the Image menu and choose Image Size |
|
|
Make adjustments to your image as shown in the picture opposite.
NB: The resolution must be 300 pixels/inch. The Document Size will depend on how big you want the picture to be. Because the bigger the size the more memory it will require, you should try to make the picture only as big as necessary.
|
 |
|
|
|
Saving as an EPS TIFF |
|
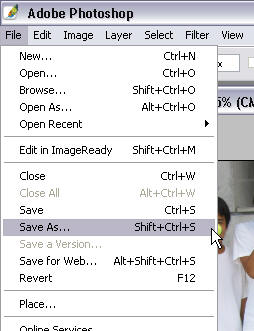
| To save the image as an EPS, go to the File menu and choose Save As |
|
| Choose the correct folder to save the photo | 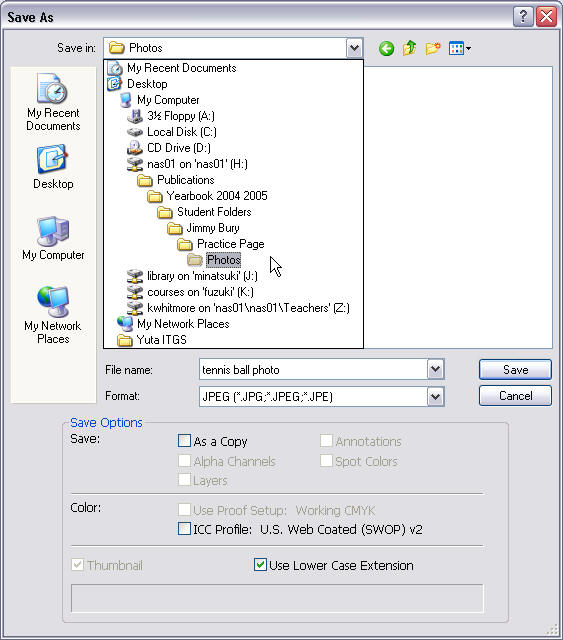 |
|
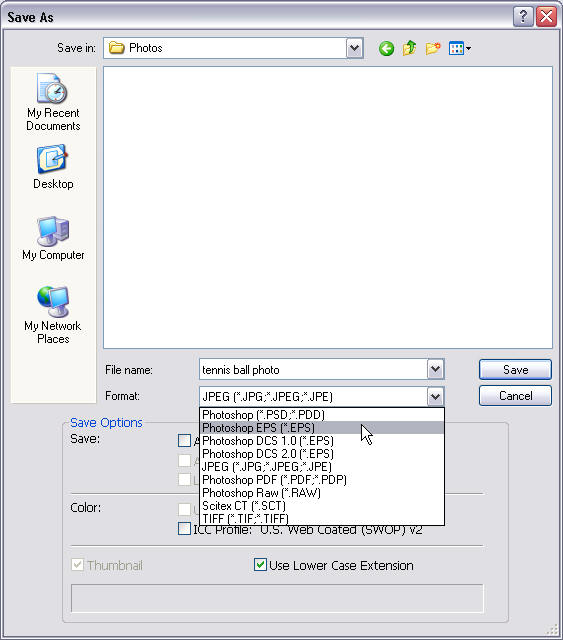
In the Format section choose Photoshop EPS (*.EPS)
Type a name for your photo
|
|
| In the EPS Options open the Encoding window and choose TIFF (8 bits/pixel) | 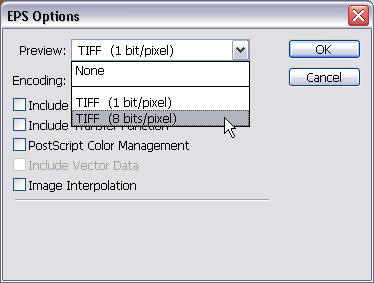
|
| Look at your picture, it started as a RGB jpg at 72dpi and now it should be a CMYK eps tiff at 300dpi ready to be used in a yearbook page. | 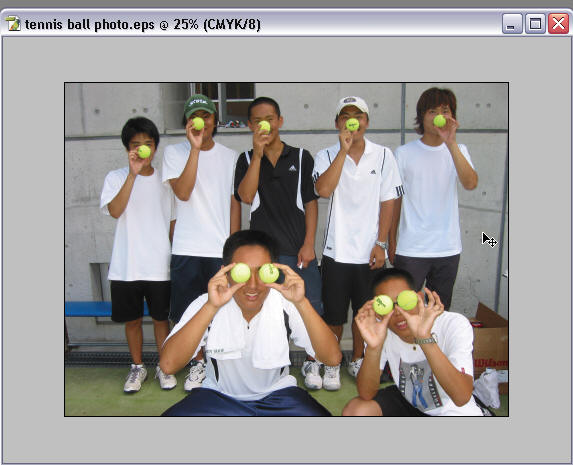 |